

How to wire three phase motor?
We'll cover useful advice and methods for wiring a three-phase motor in this article.
Are you an engineer, electrician, or DIY enthusiast looking to wire a three-phase motor? If so, you're in luck because in this article, we'll be sharing practical tips and techniques for wiring a three-phase motor. But first, let's talk about what a three-phase motor is and why it's important.
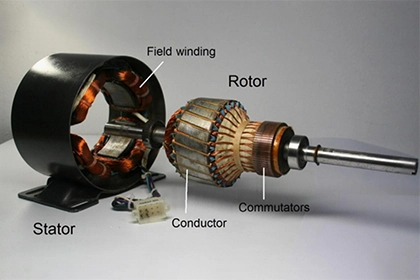
A three-phase motor is a type of electric motor that uses three separate electrical phases to generate rotational force. These motors are commonly used in industrial settings, where they power heavy machinery, such as conveyor belts, pumps, and compressors. They are known for their efficiency and reliability, making them the go-to choice for many manufacturing and production facilities.
Now, let's move on to the steps for wiring a three-phase motor. The process can seem daunting, especially for those who are new to electrical work. However, with the right tools and techniques, anyone can successfully wire a three-phase motor.
Step 1: Gather the necessary tools and equipment
Before you begin wiring your three phase motor , make sure you have all the necessary tools and equipment. You'll need wire strippers, a screwdriver, a voltage tester, and the appropriate wires for your specific motor. It's important to use the correct wires, as using the wrong ones can damage the motor and lead to a potential safety hazard.
Step 2: Identify the motor's terminals
The next step is to identify the terminals on your motor. Most three-phase motors will have six terminals, with two for each phase. The terminals are labeled as T1, T2, T3, T4, T5, and T6. You'll also need to locate the ground terminal, which is usually labeled as "GND" or "GRD."
Step 3: Wire the motor for low voltage
If you're wiring the motor for low voltage, you'll need to connect the three phases to the terminals in the correct order. Typically, the phases are labeled A, B, and C. Connect phase A to terminal T1, phase B to T2, and phase C to T3. Next, connect the ground wire to the ground terminal.
Step 4: Wire the motor for high voltage
If you're wiring the motor for high voltage, the process is slightly different. Instead of connecting the phases to the terminals directly, you'll need to use a special configuration called a "delta connection." Connect phase A to terminal T1, phase B to T2, and phase C to T3. Then, connect a jumper wire from T1 to T6, another from T2 to T4, and another from T3 to T5. Finally, connect the ground wire to the ground terminal.
Step 5: Test the motor
Once you've wired the motor, it's important to test it to ensure that it's functioning properly. Use a voltage tester to check the voltage across each phase, as well as the ground. Make sure that the voltage is within the motor's operating range, and that all three phases are functioning correctly.
In conclusion, wiring a three-phase motor can seem daunting at first, but with the right tools and techniques, anyone can do it. By following the steps outlined in this article, you can ensure that your motor is wired correctly and functioning at its full capacity. Just remember to take your time, double-check your work, and stay safe when working with electricity.

Leave a Comment